Background removal workflow
Remove Background from Ceramic Product Photos
Prepare a ceramic product cutout while keeping its actual shape and surface visible. Check the handle opening and contact shadow before placing it in a new layout.
Try your imageOne JPEG, PNG or WebP · under 10 MB · PNG output
Before you upload
- Photograph the whole item, including the lip, base and handle. Leave a small margin around the outer shape.
- Use a plain surface that separates from the glaze. Avoid letting a white rim disappear into an overexposed white background.
- Choose one JPEG, PNG or WebP under 10 MB. A second view needs its own upload; the tool does not create unseen sides.
Online tool
Upload one ceramic product photo
Up to 10 MB · 1 credit only after success
Sign in to remove the background from one image, inspect the result, and download a transparent PNG. A completed removal uses one credit. Credits and pricing
A real first-pass example
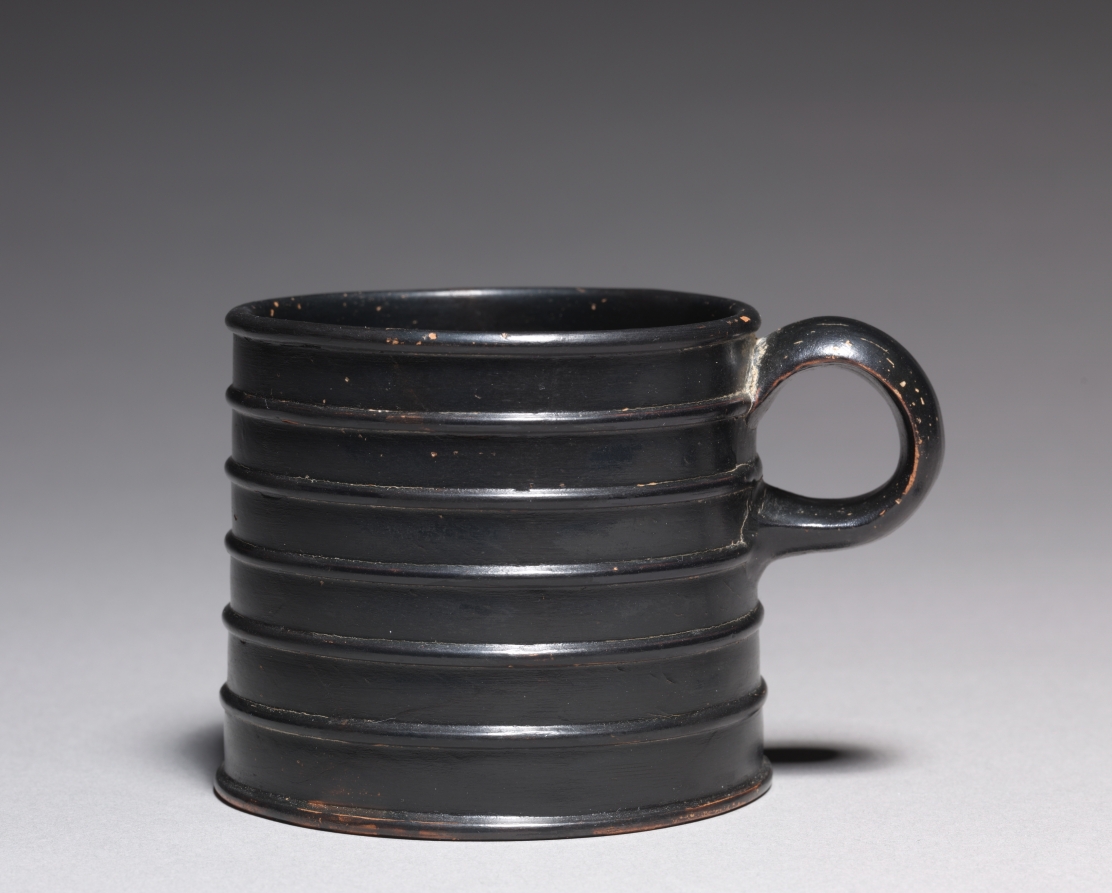
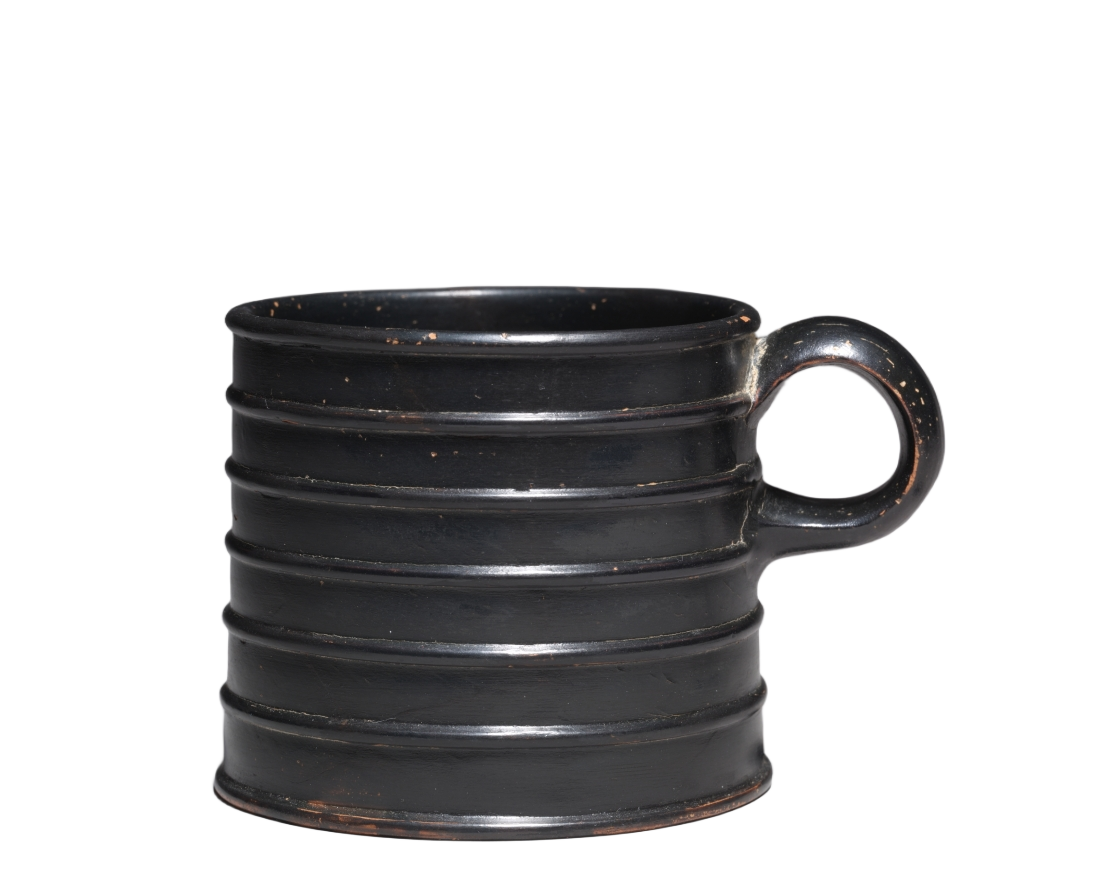
One real cutout of the Cleveland Museum of Art’s CC0 Black-Gloss Mug photograph. The handle opening, dark glaze and contact shadow are visible in the original for comparison.
Separate the outline without changing the product
Ceramic surfaces can be glossy, speckled, cracked or translucent. Background removal estimates a mask around the photographed subject; it does not repair chips, change the glaze or make a mug symmetrical. Photograph the condition you intend to show and retain an unedited source alongside the result.
Soft light can make the rim and handle easier to distinguish. Strong reflections can still be part of the object and remain after the surrounding background is removed. A clear glass object or a very translucent glaze is a different challenge from the opaque ceramic sample shown here; this example does not demonstrate accurate removal through transparent materials.
Look through the handle and around the base
A mug can have a convincing outer silhouette while still retaining the original background inside its handle. Compare that opening with the original photo, especially around the points where the handle joins the body. Also inspect the rim and the narrow highlight along a glossy edge for accidental transparency.
The contact shadow under a cup can be kept partly, removed completely or mistaken for part of the product. Review the cutout on a light and a dark background before deciding whether that shadow suits the new layout. This tool does not offer a separate shadow layer or a shadow-strength control.
Make a listing composite you can verify
Place the approved PNG over your intended background in an editor and keep the product proportions unchanged. A cutout that appears to float may need a deliberately composed scene, but background removal itself does not generate a new tabletop or studio setting. Check the edge again after scaling the image to the size used in the listing.
If a handle hole remains filled or the rim becomes broken, start from a clearer, more contrasting photograph or refine the mask manually. Keep flaws that matter to the buyer visible. Do not use a cleaned silhouette to imply that an antique, handmade or damaged item has a different physical condition.
Check before you use the result
- The background inside the handle is removed where expected.
- The rim, lip and base are complete.
- Glaze decoration and existing surface marks remain visible.
- The contact shadow does not leave an unwanted dark block.
Questions about this workflow
Does it change the glaze or remove chips?
No. It removes the detected background. Product color, decoration and condition should be checked against the original photograph.
Can it keep a natural shadow?
A shadow may survive partly, but there is no separate shadow control. Inspect the result before placing it over a new background.
Does it work through clear glass?
This ceramic workflow does not establish that capability. Transparent objects can retain background colors or lose highlights.